

Table of Contents
- How to Set Up a Hardware Wallet: What You'll Need Before You Start
- How to Verify Hardware Wallet Authenticity Before Setup
- Step-by-Step Hardware Wallet Setup: From Unboxing to PIN
- Hardware Wallet Recovery Phrase Best Practices
- How to Transfer Crypto to Hardware Wallet
- Common Setup Mistakes to Avoid
- Frequently Asked Questions
Last Updated: September 27, 2026
How to Set Up a Hardware Wallet: What You'll Need Before You Start
The global hardware wallet market hit USD 0.72 billion in 2026 and is growing at 25.59% per year, according to Mordor Intelligence's hardware wallet market report. That growth tells you something important: more people are moving their crypto into cold storage. This guide from The Crypto Merchant walks you through how to set up a hardware wallet safely, step by step.
Before you start, gather these items:
- Your hardware wallet device
- The included USB cable
- A computer or smartphone
- The recovery phrase backup cards that came in the box
- A pen (not a pencil)
- A private, quiet space with no cameras or onlookers
How to Verify Hardware Wallet Authenticity Before Setup
A tampered device is a compromised device. Verifying authenticity before setup is the single most important step, and it takes less than five minutes.
Then check the device itself:
- Inspect for scratches, scuffs, or signs of prior use
- Confirm all included accessories match the official packing list
- Check that the holographic sticker (if included) is genuine
- Never use a device that arrives with a pre-written seed phrase
Step-by-Step Hardware Wallet Setup: From Unboxing to PIN
The full setup process runs through five steps, from physical inspection to a working PIN-protected wallet.
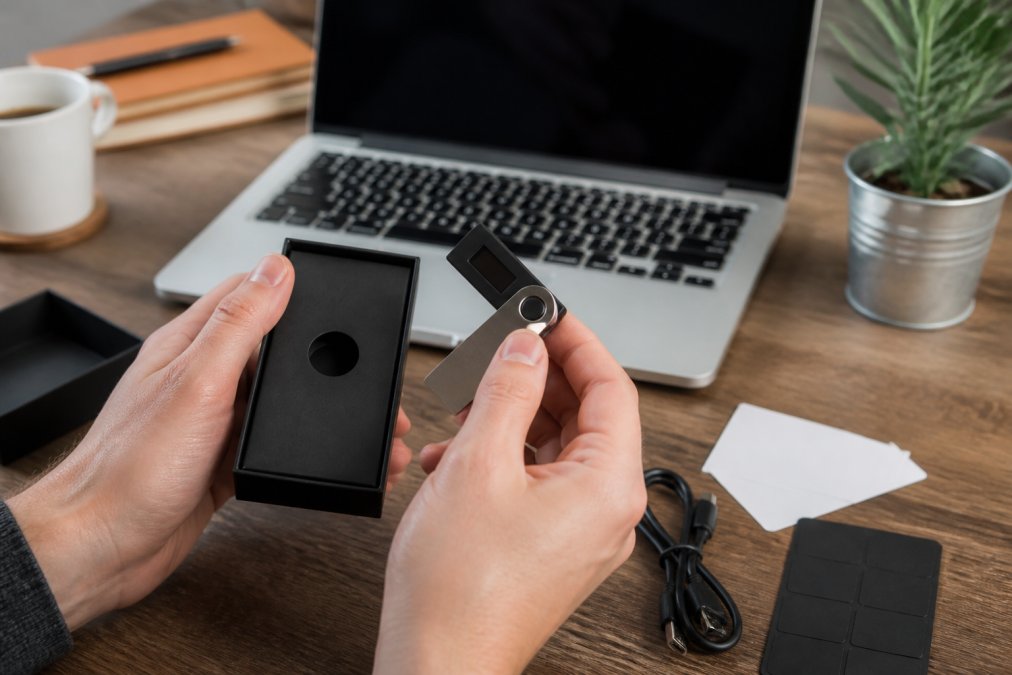
Step 1: Unbox and Inspect the Device
Open the box slowly and check every item against the packing list. Look for tamper-evident seals and any physical damage. If anything looks off, do not proceed.
Step 2: Download the Official Companion App and Update Firmware
Go directly to the manufacturer's website and download the companion application. Never use a link from an email or search ad.
Step 3: Connect and Initialize Your Device
Plug the device into your computer using the included cable. The companion app will detect it and prompt you to initialize.
Step 4: Generate a New Wallet and Write Down Your Recovery Phrase
The device will display a recovery phrase, usually 12 or 24 words. This is your master backup.
Step 5: Verify Your Recovery Phrase and Set a PIN
The app will ask you to confirm several words from your phrase. This catches transcription errors before they become permanent.
Hardware Wallet Recovery Phrase Best Practices
Your seed phrase is the wallet. The device is just a tool. Lose the device and you can recover everything with the phrase. Lose the phrase and your funds are gone forever. This is the section most guides rush, and it's the one that decides whether your setup survives a house fire, a flood, or a burglary.
Paper vs. metal: what actually survives
Paper backup cards are what ship in the box, and they're fine for the first week. They are not fine for a decade. Paper burns at roughly 451°F, warps with humidity, fades under UV light, and dissolves in a flood. A metal backup plate stamped or engraved with your words survives all four. The trade-off is cost and effort: a stamped steel plate runs roughly USD 50 to USD 150 depending on the brand and whether you stamp it yourself, and the stamping process takes 30 to 60 minutes.
Split storage: the 2-of-3 pattern
Storing the full phrase in one place creates a single point of failure. A common pattern is to split the phrase across two or three secure locations, for example, a home safe, a bank safe deposit box, and a trusted relative's safe, so that no single theft or disaster exposes the whole phrase. The trade-off is complexity: if you split wrong (say, first half here, second half there), a thief who finds one half has cut your search space dramatically.
 Trezor Model OneView product
What never to do
- No digital copies. No photos, no cloud notes, no password manager entries, no email drafts to yourself. Every one of those is a target.
- No typing the phrase into any device except during a deliberate recovery test on your hardware wallet.
- No sharing any part of the phrase with anyone, including someone claiming to be support. Legitimate manufacturers never ask for it.
- No single-location paper storage for anything you can't afford to lose.
Test your backup before you need it
The only way to know your backup works is to use it. Wipe the device, restore from your written phrase, and confirm the derived addresses match what you saw before. Do this once at setup and again every 12 to 18 months. A backup you've never tested is a hope, not a plan.
How to Transfer Crypto to Hardware Wallet
Moving funds to your new wallet is straightforward, but one mistake here is costly. Always send a small test amount first.
The basic receive flow
- Open the companion app and select the asset you want to receive
- Copy your wallet address from the app
- Double-check the first and last characters match
- Send a small test transaction from your exchange or software wallet
- Confirm the funds arrive, then send the rest
Your hardware wallet never exposes your private keys during this process. The public keys generate receiving addresses, which are safe to share.
Pick the right address type before you receive
Most hardware wallets let you generate more than one address format for the same asset, and choosing the wrong one during setup causes compatibility headaches later. The three you'll see most often:
 Trezor Model TView product

-
Legacy (P2PKH), addresses start with
1for Bitcoin. Maximum compatibility with old services, but higher transaction fees because the format is less efficient. -
Nested SegWit (P2SH-P2WPKH), addresses start with
3. A middle ground that works with most older services while cutting fees versus legacy. -
Native SegWit (P2WPKH, bech32), addresses start with
bc1. Lowest fees and the modern default, but a handful of very old services still don't recognize the format.
Multi-signature setup: when one device isn't enough
A single hardware wallet has a single point of failure: whoever holds the seed phrase controls the funds. A multi-signature (multi-sig) setup requires two or more devices, often from different manufacturers, to approve a transaction before it broadcasts. A common configuration is 2-of-3: three keys exist, any two can spend.
Setting up multi-sig is a step beyond basic initialization:
- Choose a coordinator. This is software (or a service) that builds the transaction and collects signatures. It never holds your keys.
- Register each hardware wallet as a cosigner. Each device generates its own seed phrase and its own extended public key (xpub).
- Define the policy. For example, 2-of-3 means any two of the three cosigners must sign.
- Back up every seed phrase separately. Each device's seed is its own backup. Losing one seed in a 2-of-3 is survivable; losing two is not.
- Test with a small transaction before moving real holdings.
Privacy-focused initialization
Most default setup flows phone home, the companion app may check for firmware updates, report device telemetry, or sync addresses to a vendor server. If that matters to you, two approaches reduce the footprint:
- Air-gapped setup. Some devices support fully offline initialization via SD card or QR code, so the device never touches a networked computer. You generate keys, sign transactions, and move data by physical media.
- Self-hosted companion software. Instead of the vendor's app, some users pair their hardware wallet with open-source, self-hosted wallet software that talks directly to their own node. This avoids leaking your address set to a third party.
Common Setup Mistakes to Avoid
Most setup failures trace back to a handful of avoidable errors. Here are the ones that cost people the most.
- Buying from unauthorized sellers. Counterfeit devices can arrive pre-compromised.
- Skipping the firmware update. Outdated firmware has known exploits.
- Storing the seed phrase digitally. Screenshots and cloud notes get hacked.
- Rushing the phrase verification. Typos discovered later are unrecoverable.
- Using a weak PIN. Four digits beat a birthday every time.
- Not testing recovery. Restore your wallet once to confirm the phrase works.
Frequently Asked Questions
What are the disadvantages of a hardware wallet?
Hardware wallets require an upfront purchase, typically $29 to $149.99, and demand careful seed phrase management. If you lose your recovery phrase and the device fails, your funds are gone. Some users find the setup process intimidating, and certain models lack Bluetooth or mobile support. Additionally, manufacturer-provided recovery services have raised centralization concerns, according to a 2024 ACM study. Despite these drawbacks, self-custody eliminates exchange hacking risks.
What happens if I lose my hardware wallet?
If you lose your hardware wallet, you can restore access to your crypto using your recovery phrase on a new compatible device. The recovery phrase is the only backup that matters. Without it, your funds are permanently inaccessible. Store your recovery phrase offline in a secure location, such as a fireproof safe or a metal backup plate. Never store it digitally or share it with anyone. A 2026 industry best practice emphasizes offline storage as one of three pillars of hardware wallet security.
How do I verify that my hardware wallet is authentic?
To verify hardware wallet authenticity, purchase directly from the manufacturer or an authorized distributor like The Crypto Merchant. Check the packaging for tamper-evident seals and ensure the device firmware is genuine by updating only through the official companion app. Never use a device that arrives pre-initialized or with a pre-written seed phrase. The importance of buying from trusted sources and verifying firmware integrity before use is highlighted by past security incidents.
Is it safe to store Bitcoin on a USB drive?
No. A USB drive is not a hardware wallet. USB drives lack secure element chips, PIN protection, and on-device transaction confirmation. They are vulnerable to malware and physical theft. Hardware wallets like the Trezor Model One or Ledger Nano X are purpose-built to keep private keys offline and require physical confirmation for every transaction. Using a USB drive for crypto storage exposes your private keys to remote hacking risks that hardware wallets are designed to eliminate.


