How To Use Third Party Wallets With The Trezor Model T
The Trezor Model T is one of the best hardware wallets for supporting the most different cryptocurrencies. The Trezor company is continuously adding support for more cryptoassets to the Model T. Most of the major cryptocurrencies can be accessed through Trezor’s native web interface. Some other cryptocurrencies supported by the Trezor Model T will need to be accessed through third party wallets. All ERC20 tokens can be accessed through the Trezor native Ethereum interface or through MyEtherWallet. This guide will show you how to use the following third party wallets with your Trezor Model T.
Stellar - Stellar Account Viewer
Cardano – AdaLite
NEM – Nano Wallet
Monacoin – Electrum-MONA
Tezos – SimpleStaking
Note: When you use a third party wallet with your Trezor Model T, the private keys that secure your assets are still stored exclusively offline on the Model T. The third party wallets are only interfaces that allow you to make transactions and view your balances.
Before you begin, make sure you have setup your Model T with a PIN code, recovery seed and the latest firmware. If you have not already done so, you can follow this guide.
- First, check if the cryptocurrency you want to use is accessible with the Trezor native interface or with a third party wallet.
- If there is not a checkmark in the Trezor Wallet column for Model T compatibility with that particular coin, then you will need to use a third party interface. You will find links to download or use the third party wallet that you need in the far right column.
Steller - Stellar Account Viewer
- Go to Stellar Account Viewer.
- Plug in your Trezor Model T and click on “sign in with Trezor.” When the screen prompts you to connect your Trezor to continue, enter in the PIN code on your Model T.
- Click on “Allow” and then “Export.”
- You should now be signed into the Stellar wallet. You can view your balance and make transactions.
- If you are opening a new account, you will receive a message:“This account is currently inactive. To activate it, send at least 1 “lumen” (XLM) to the Stellar public key displayed above.”
- To receive lumens into your Trezor Model T, just copy and paste the public key into the exchange or wallet where your lumens are currently being stored.
- To send lumens from your Trezor Model T to another wallet, copy and paste the public key of the recipient, specify the amount and click “Send lumens.”
Join the 10,000+ crypto investors & enthusiasts and get 10% off your first order.
Cardano – AdaLite
- Go to AdaLite, the Cardano Wallet.
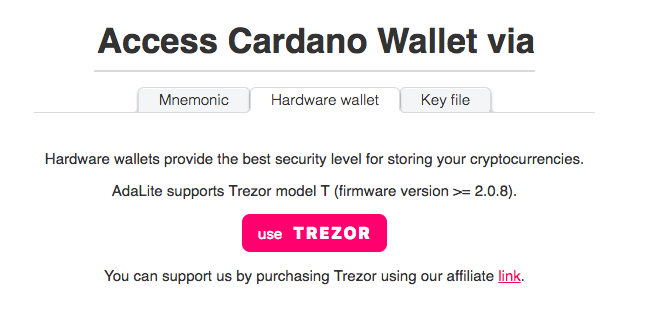
- Click on “Hardware Wallet” and then “Use Trezor.”
- Connect the Trezor Model T and enter in your pin. Click on “Allow” and “Export.”
- You are now signed into the AdaLite Wallet.
- To receive funds into your Trezor Model T, click on “receive” in the menu at the top.
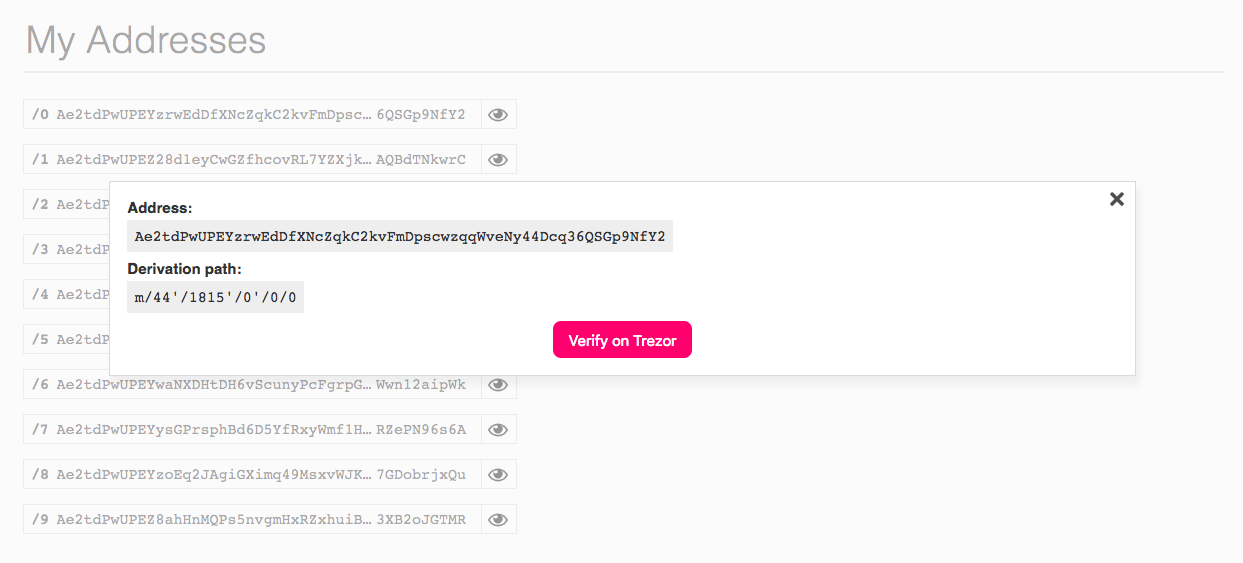
- You can use anyof the addresses listed. Click the eye icon to “show full address” and then you can copy and paste this full address into the wallet or exchange where your Cardano is currently being stored.
- You can then verify this address on the Trezor Model T’s screen. This serves as a security measure to confirm that the address on your Model T’s screen is the same as the address shown on the AdaLite wallet on your computer screen. Press the green checkmark on the Model T’s touchscreen to confirm that these two addresses are the same.
- You can now copy and paste the full address into the wallet or exchange where your Cardano is currently being stored.
- To send Cardano, click on “send” in the top menu. Then simply paste in the receiving address, specify the amount and click “submit.”
NEM – Nano Wallet
- Download the NEM Nano wallet.
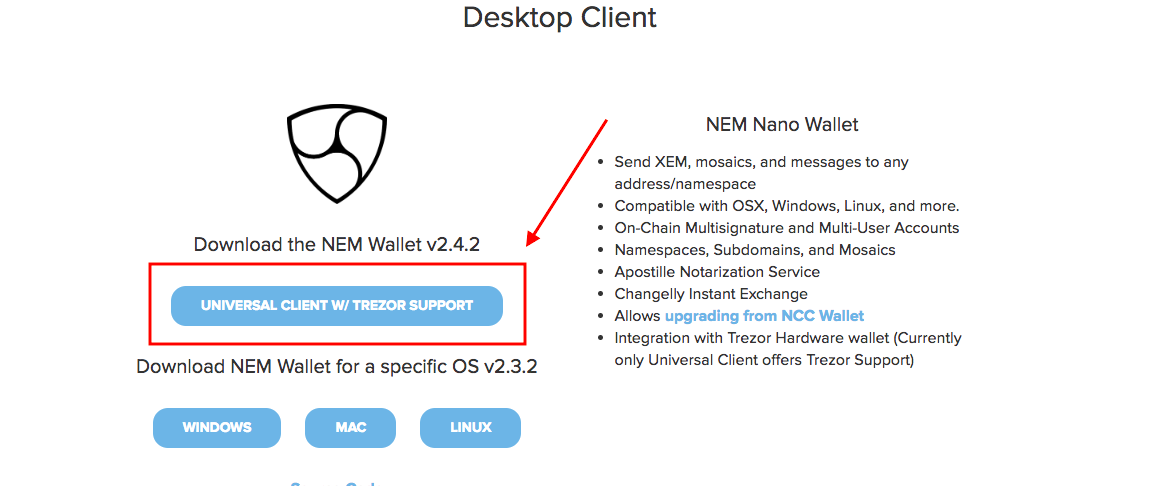
- Scroll down and in the download section select “Universal Client W/ Trezor Support.”
- Once the file is downloaded, extract the file and open the folder. Double-click on the “start.html” document to open the Nano wallet in your default browser.
-
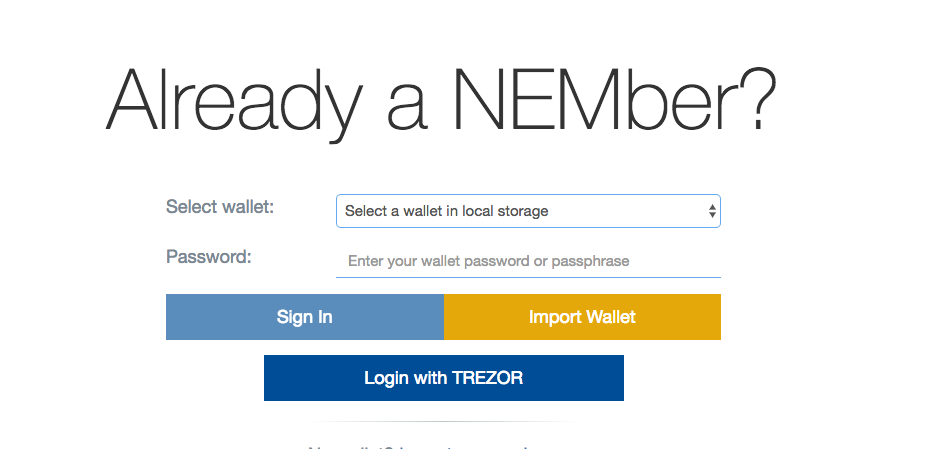
Click on login in the upper right corner and in the next window, click “Login with Trezor.”
- Select the Mainnet network and click “next.”
- Connect your Trezor device and enter in the PIN code.
- The Nano Wallet will then ask you to “Export NEM address for account #1 on network Mainnet.” Click on “Export.”
- The Trezor Model T’s screen will display the Mainnet address for account #1. Press the green checkmark to confirm.
- You are now logged into the Nano wallet.
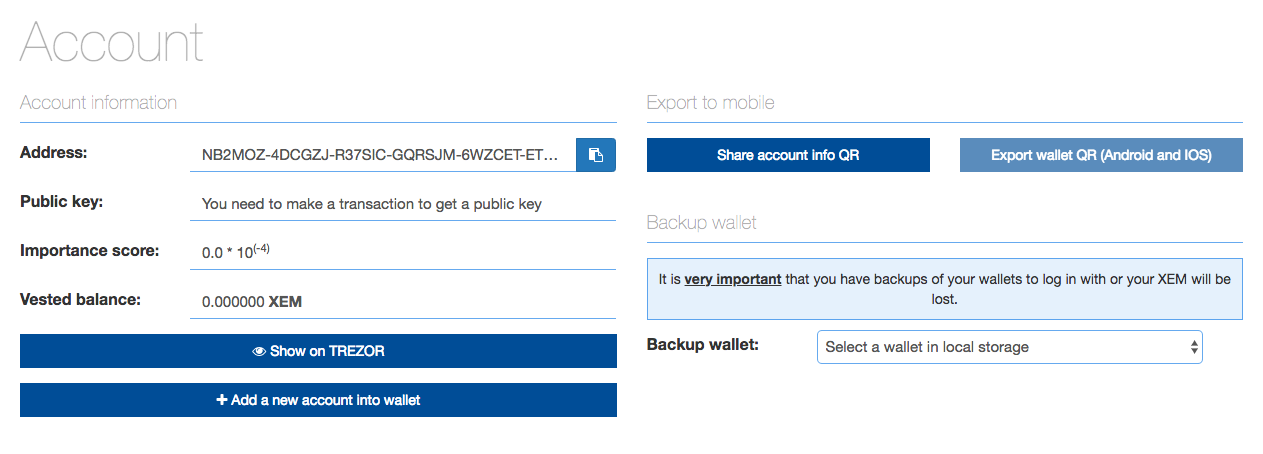
- To receive XEM into your Trezor Model T, click on “Account” in the top right corner. In NEM, you only have one address per account.
- Copy and paste the full address into the wallet or exchange where your XEM is currently being stored. You can click “Show on Trezor” to confirm the address you copied is correct. Always trust the address on your Trezor Model T’s screen over the address on your browser.
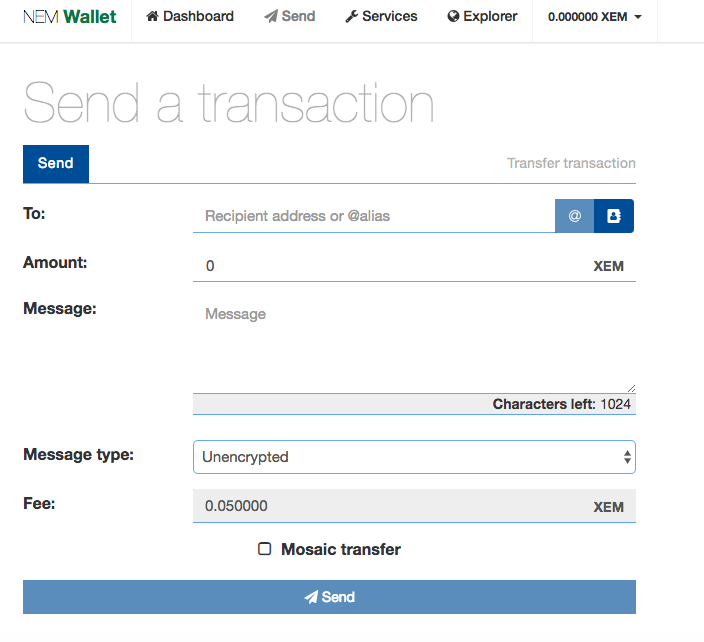
- To send XEM from your Trezor Model T, click on “Send” in the top menu bar.
- Paste in the recipient address, specify the amount and click “Send.”
Get free crypto investing & security guides, exclusive discounts, and more!
Monacoin – Electrum-MONA
- Download the Electrum-MONA wallet for your operating system.
- Install Electrum-MONA and follow the instructions.
- When the installer asks you what kind of wallet you want to create, select “Standard Wallet.”
- When the installer asks you if you want to create a new seed, select “Use a hardware device.”
- Plug in your Trezor Model T, enter in your PIN code and click “next.”
- Choose whether you are using legacy or segwit addresses.
- You will now be signed into the Electrum-MONA wallet. In the top menu you can choose whether to send or receive cryptoassets.
Tezos – SimpleStaking
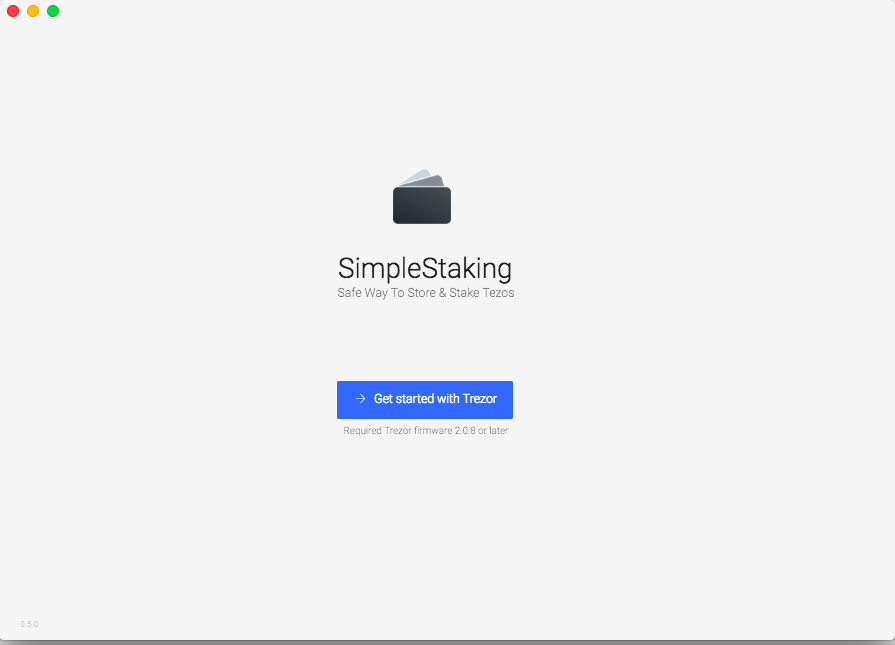
- Download and install the SimpleStaking wallet.
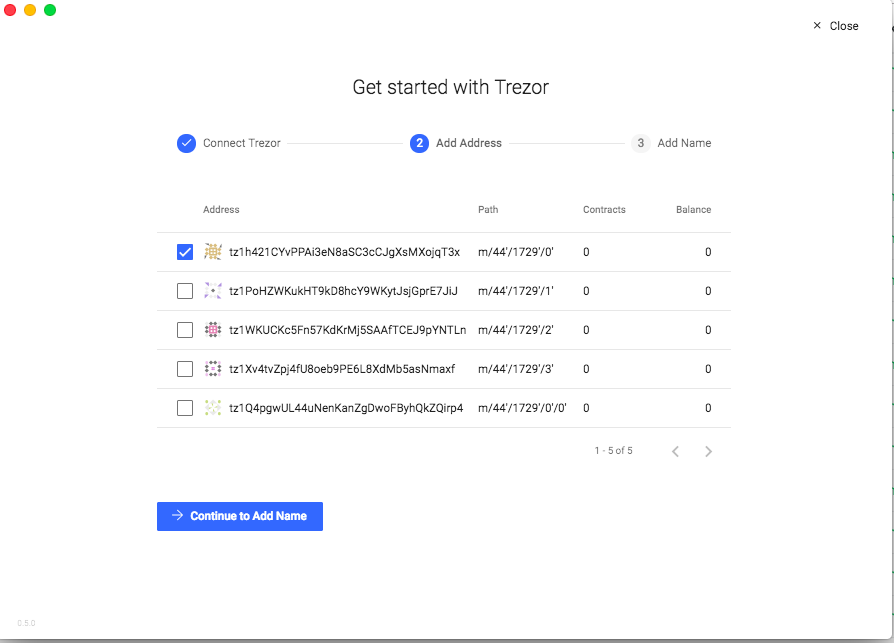
- Click on “Get started with Trezor.”
-
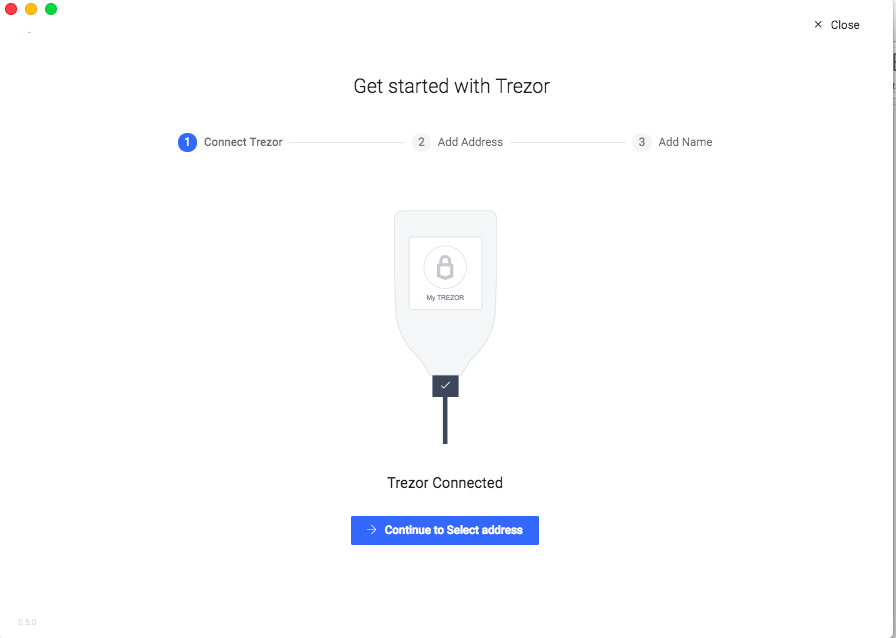
Connect your Trezor Model T, enter your PIN code and click “continue to select address.”
- Confirm the action on the Trezor Model T’s touchscreen.
- Choose any one of the five addresses and click “continue to add name.”
- You will choose any name for the address and be signed into your SimpleStaking account.
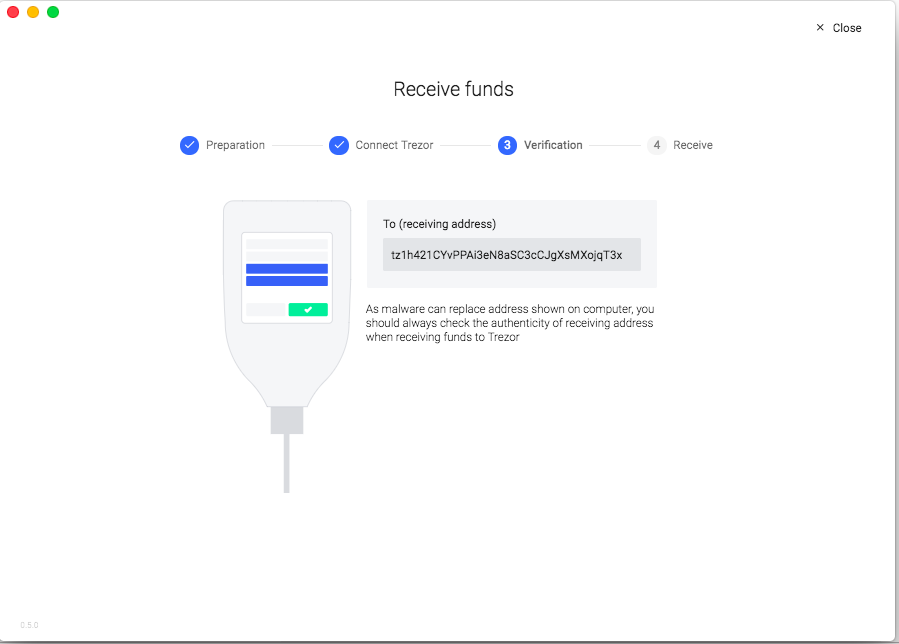
- In the menu on the left, you can send, receive and delegate funds.
- When you receive, send and delegate funds you will need to confirm the address on your Trezor Model T’s touchscreen.
Conclusion
Whether you use the Trezor native web app or a third party wallet, all of the various cryptocurrency assets that you use with your Trezor Model T will be backed up using your recovery seed. Your recovery seed ensures that if your Trezor Model T is ever lost, stolen or broken you will be able to recover all of your cryptoassets by entering the recovery seed into another Trezor or compatible wallet. For more information on the recovery seed, you can check out this article.
There are other third party wallets you can use with the Trezor Model T, and their instructions are very similar to the examples in this guide.
Trezor is also continuously adding support for more coins and more third party wallets.
JOIN NOW AND GET 10% OFF YOUR FIRST ORDER
Join the 10,000+ crypto investors & enthusiasts who receive exclusive discounts, crypto investing and security guides, digital privacy protection tips and more every week.


