How To Setup And Use The Trezor Model T Hardware Wallet
This guide gives complete step by step instructions on how to setup and use the Trezor Model T hardware wallet with the free Trezor web wallet interface. If you do not already own this next generation hardware wallet, you can purchase one here:
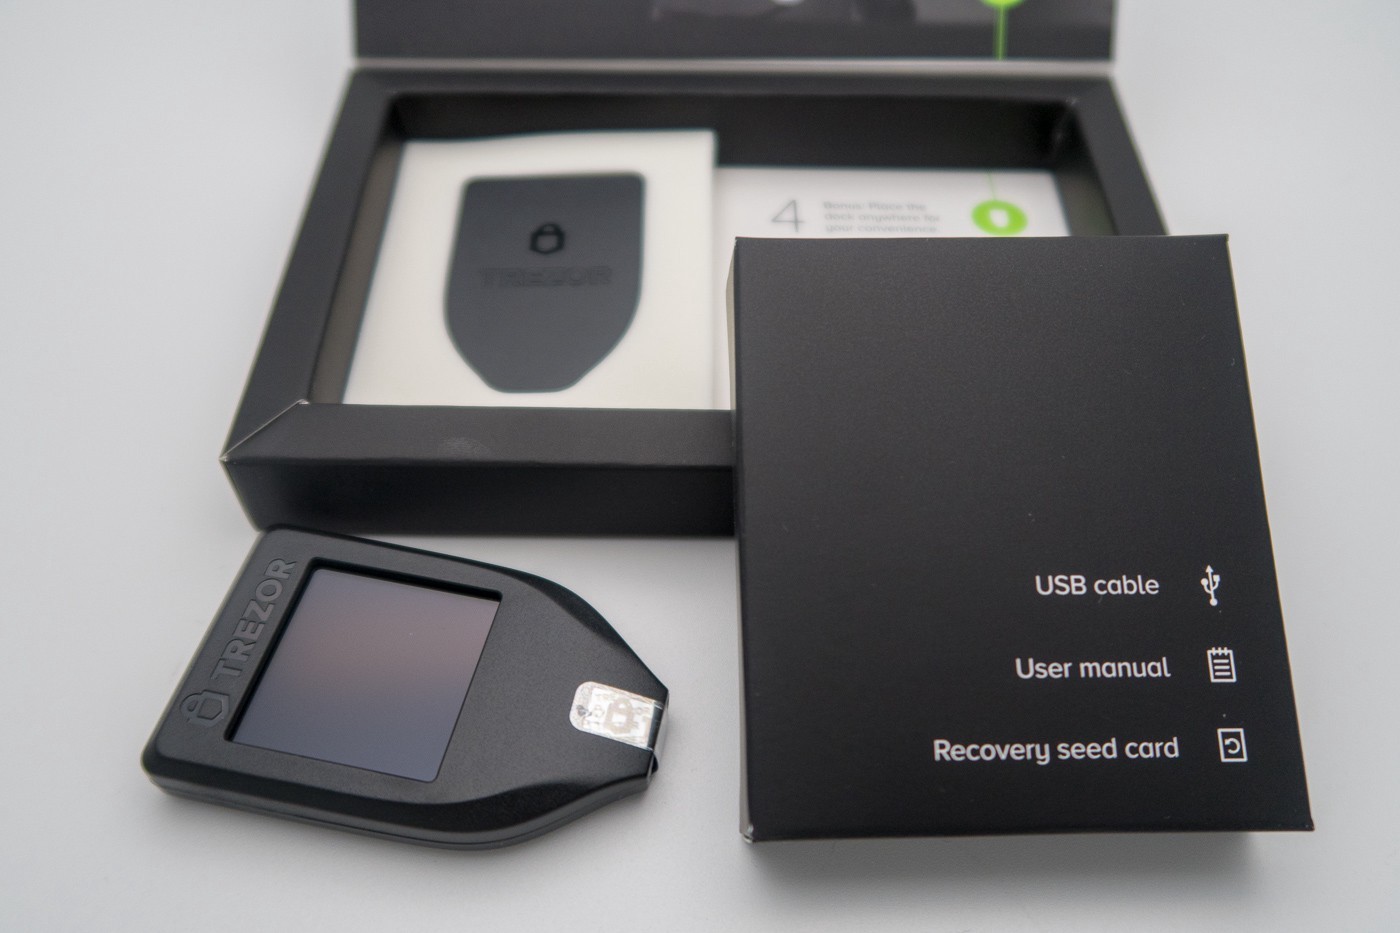
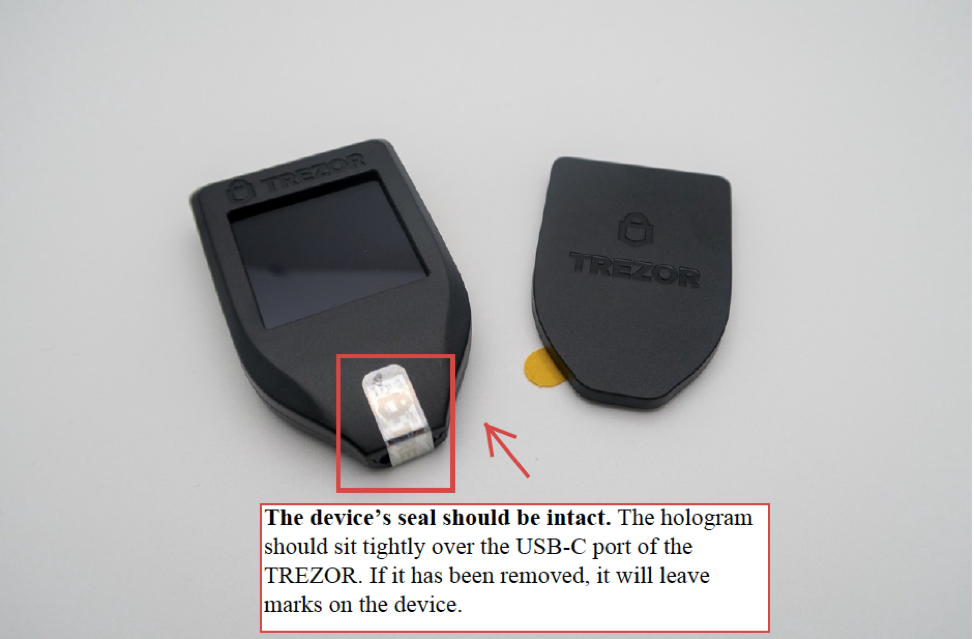
Before you plug the Trezor Model T in, make sure your device is brand new by verifying that the seal is intact.
Initializing the Trezor Model T
- Connect the Trezor Model T via the USB and follow the instructions displayed on the screen of the device.
- Open trezor.io/start in your web browser. Trezor wallet works with up to date versions of Chrome and Mozilla Firefox.
- Choose the Trezor Model T as your device.
- Download and install the Trezor bridge and then refresh the page.
- Once the Trezor wallet recognizes your device, you will automatically be asked to install the firmware. Click on “Install firmware” and wait until the installation completes and the device reboots.
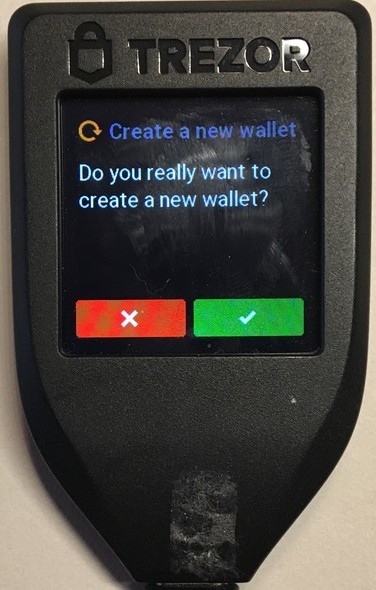
- Select “Create a new wallet” and confirm the action on the device’s touchscreen.
Join the 10,000+ crypto investors & enthusiasts and get 10% off your first order.
- You will see the message “Your Trezor is not backed up.” Click on “create a backup in 3 minutes.” Read the warning message regarding the recovery seed.
- Understand that all cryptoassets are stored on a collective decentralized network known as a blockchain. The recovery seed is the key that unlocks and gives you ownership of all of your cryptoassets.
- If your recovery seed is lost or stolen then you can lose all of your cryptoassets. You will write down this recovery seed on paper and store it in a secure location. We actually recommend you write down the recovery seed twice on two different pieces of paper and then store each of these in two secure locations. As Trezor warns, you should NEVER take a photo of your recovery seed, type the seed into a computer, save it in cloud storage or upload the seed on the internet.
- The Trezor Model T works by generating and storing recovery seeds in its secure offline microprocessor. Backing up this seed properly is your responsibility. The recovery seed is also what allows you to regain access to all of your cryptoassets if your Trezor Model T is reset, lost, stolen or damaged. As long as you have the recovery seed backed up, you can recover all of your assets by reentering the seed into any BIP32/39/44 compatible hardware or software wallet. For more information about the recovery seed, read this article:
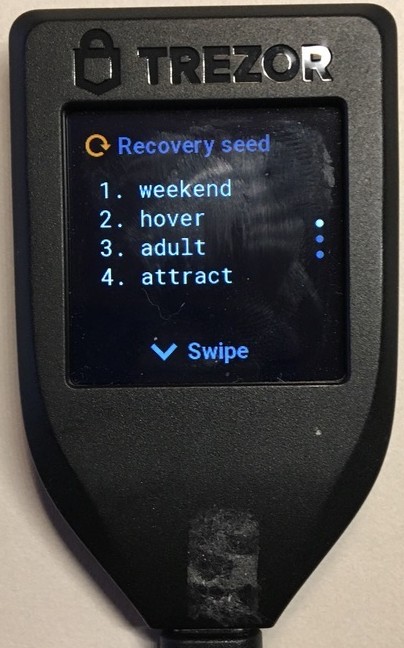
- Copy down all 12 words in the exact order that they appear on the Trezor Model T’s screen. Swipe up and down to scroll through the entire list of 12 words.
- You will be asked to confirm a couple of words by entering in them on the touchscreen.
- The Trezor Model T will now display “Pin Not Set!” Go back to the Trezor web interface and click “Continue.” Choose a name for your device and confirm on the device’s touchscreen.
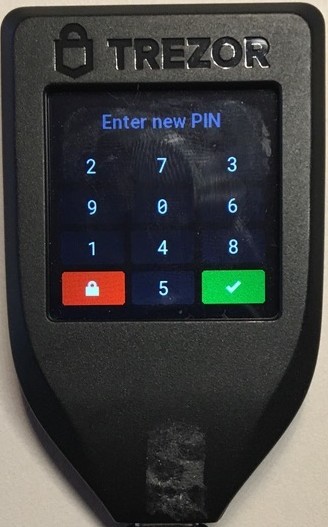
- You will now create a PIN. When the screen on the Trezor Model T displays “Do you really want to set new PIN?” press the checkmark. Enter in a pin that is 4-9 digits long. You will need to enter this PIN every time you connect your Trezor Model T. The PIN protects your cryptoassets in case somebody else were to get a hold of your Trezor Model T.
-
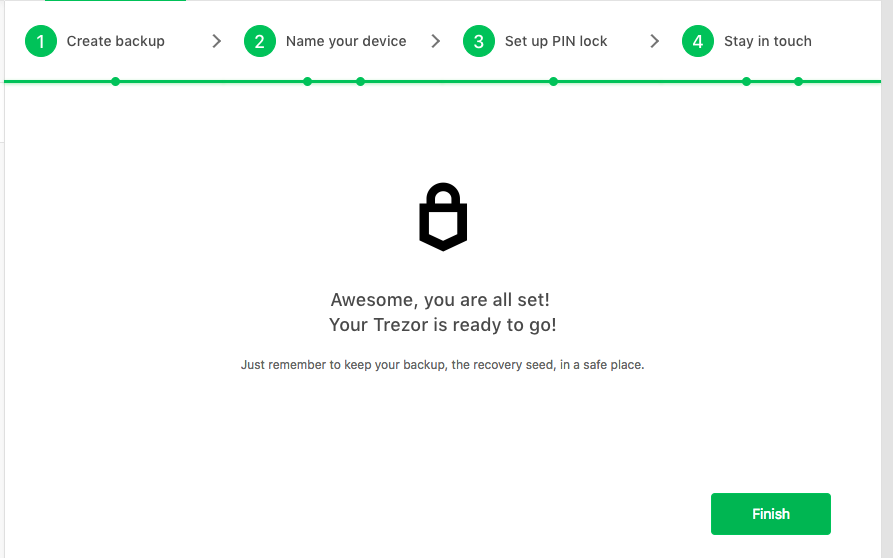
On the Trezor web wallet, choose if you want to follow Trezor via email or social media and click “Continue.” Then click “Finish.”
- You have now successfully initialized your Trezor Model T and you are ready to make transactions.
Get free crypto investing & security guides, exclusive discounts, and more!
Check recovery seed
- Trezor has an optional recovery seed check. This is to be totally sure that your recovery seed is correct. If you prefer, you can skip this step and come back to it anytime.
- The recovery seed will not work if even one character in one of the 12 words was copied down incorrectly or if your handwriting was unclear. If your recovery seed is written down incorrectly and your Trezor Model T is reset or lost then you will not be able to recover the cryptoassets associated with that recovery seed.
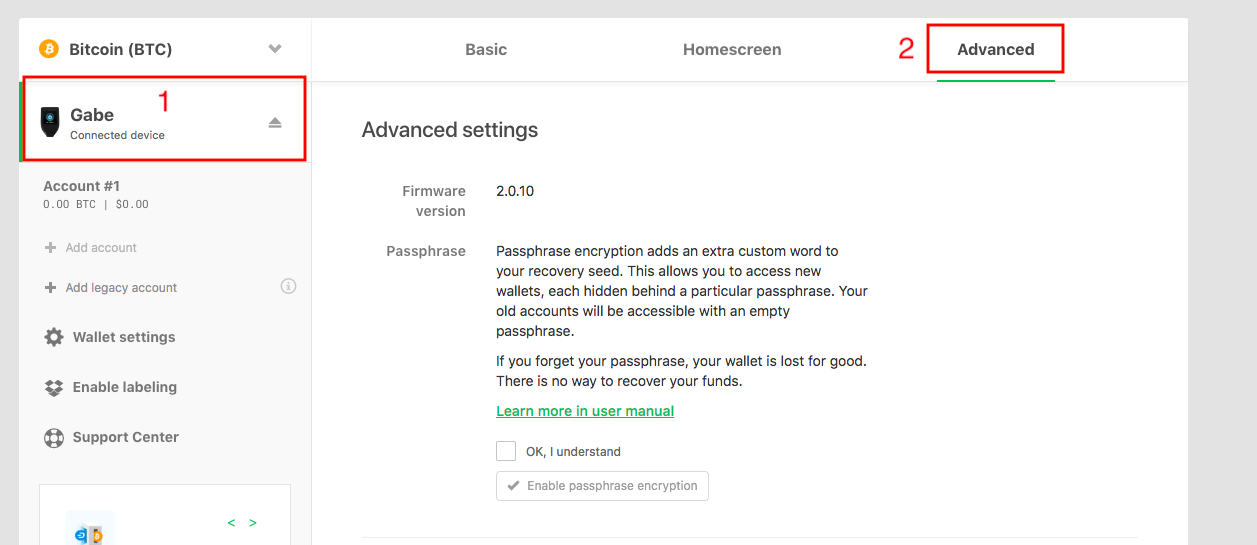
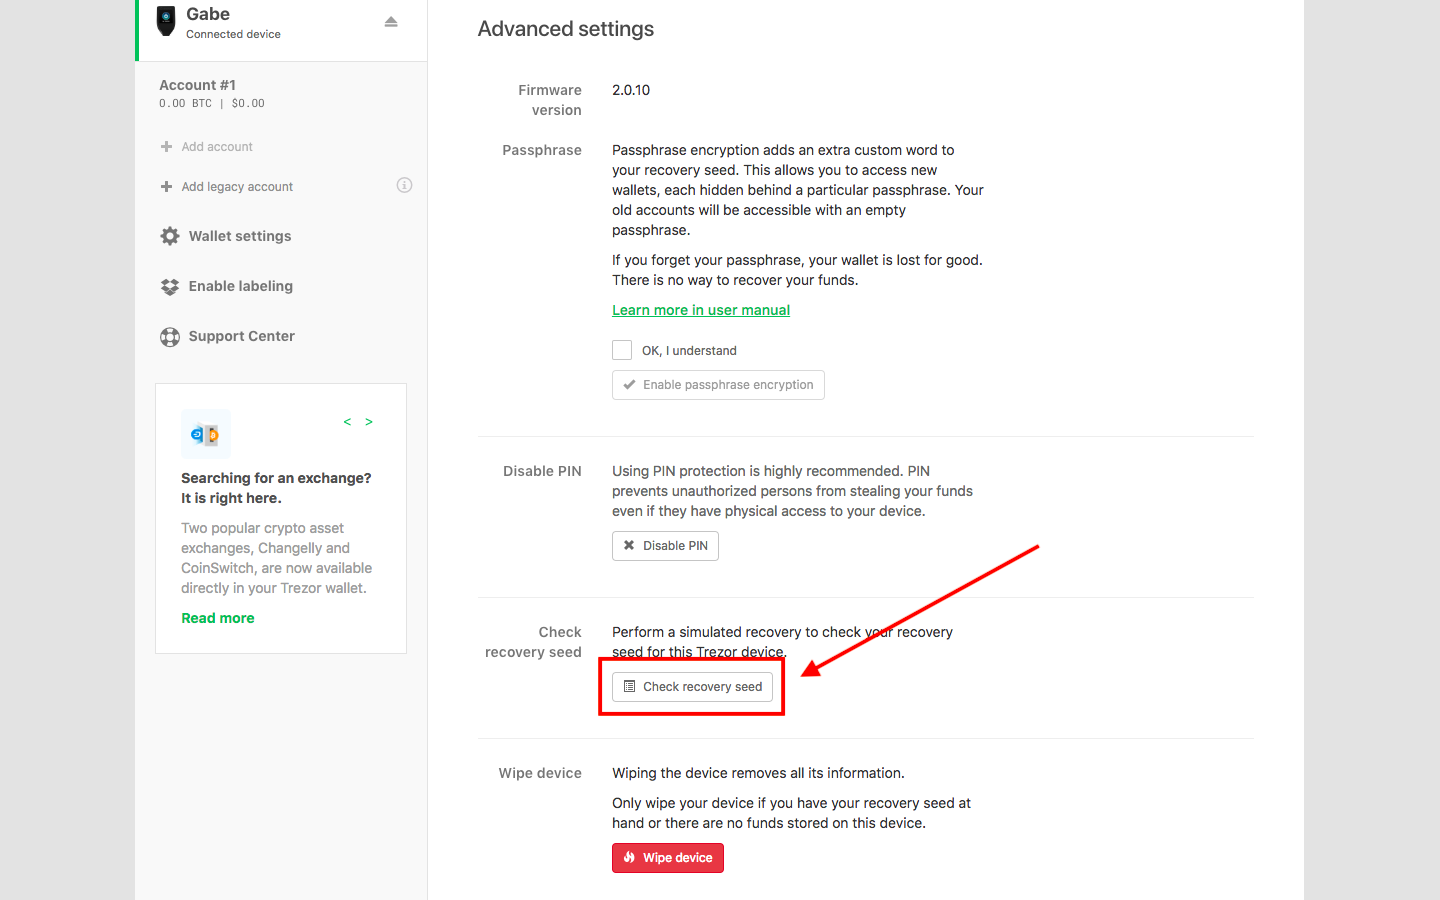
- At the left side of the Trezor web interface, click on where it shows the name of your device and displays “Connected device.”
- Click “Advanced.”
-
Scroll down and select “Check recovery seed.”
- You will then confirm this action on the Trezor Model T’s touchscreen.
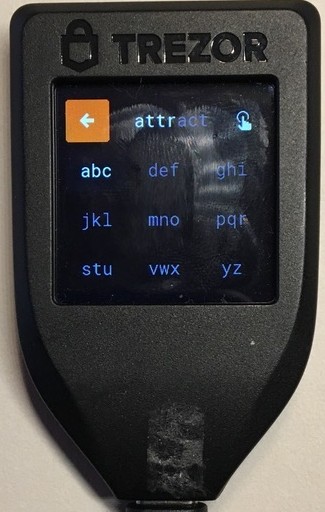
- You will be asked to type in each of the 12 words on the Trezor Model T’s touchscreen.
- We recognize this can be tedious, but after you complete this you can be totally sure that your recovery seed was written down correctly.
Receiving cryptoassets to the Trezor Model T
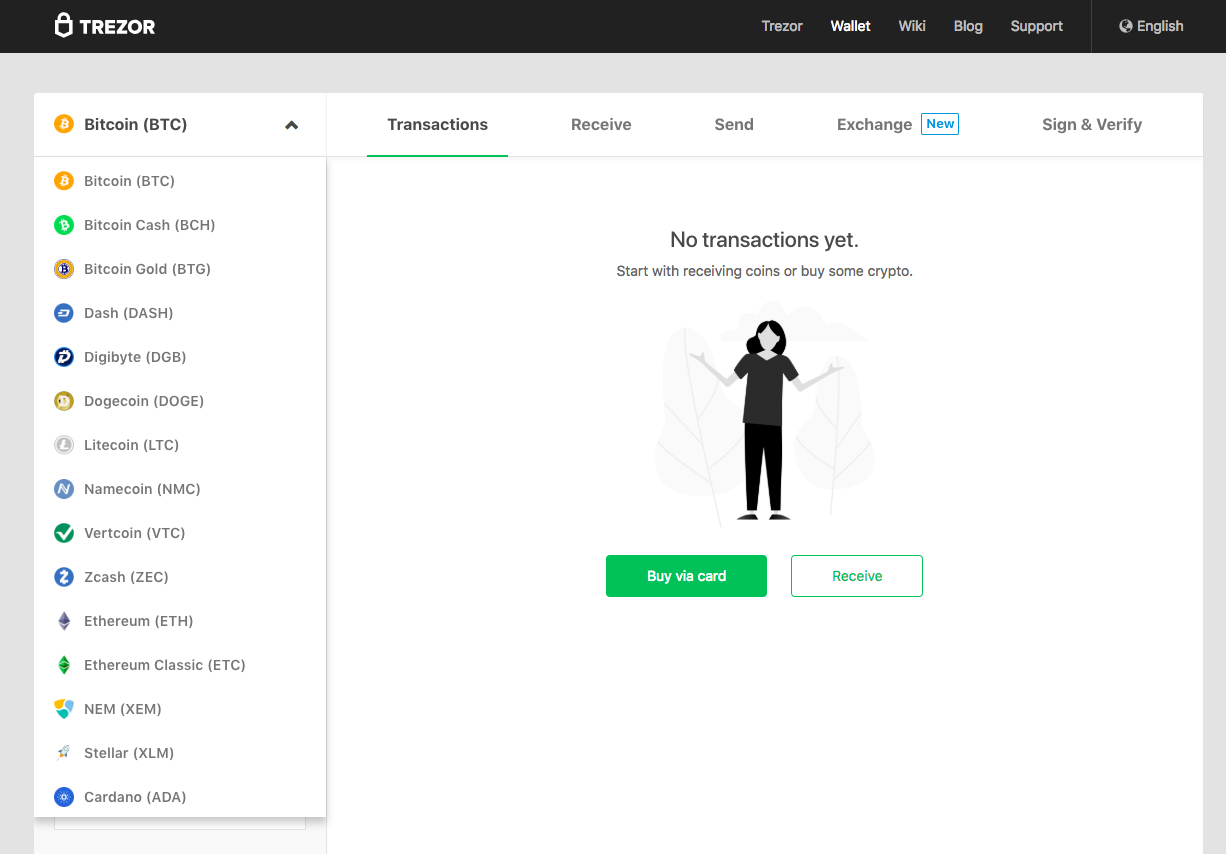
- To receive cryptoassets into your Trezor Model T, select the specific cryptocurrency you want, from the drop down menu at the top left. Note that these are not a comprehensive list of all the coins that the Trezor Model T supports. If the coin is not on this list, but is supported by the Trezor Model T, then you will need to use a third party interface to access the coin with the Trezor Model T.
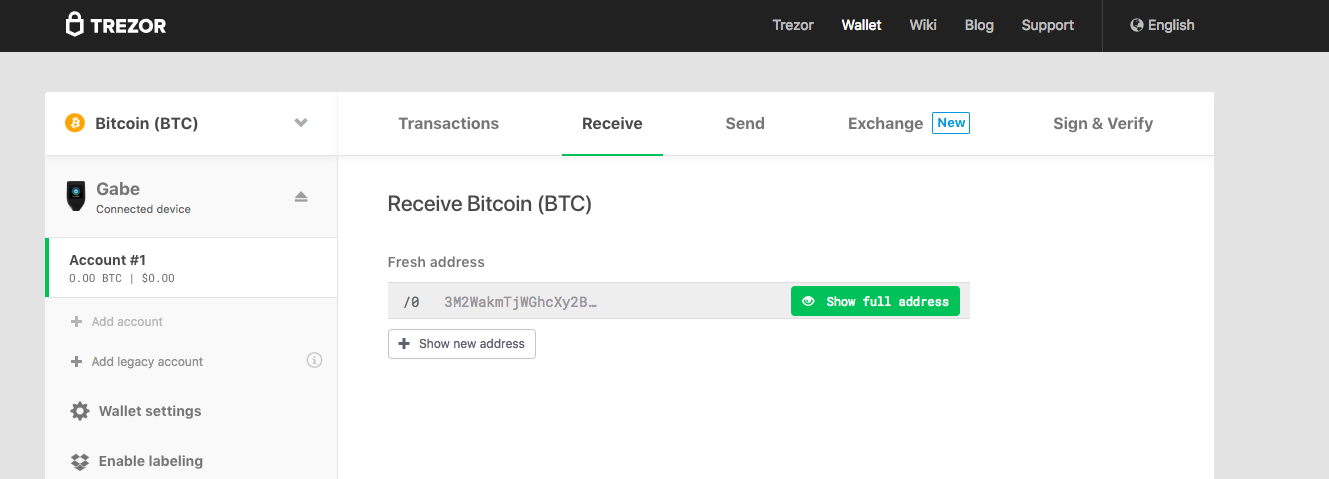
- Once you have selected the cryptoasset, click on “Receive.”
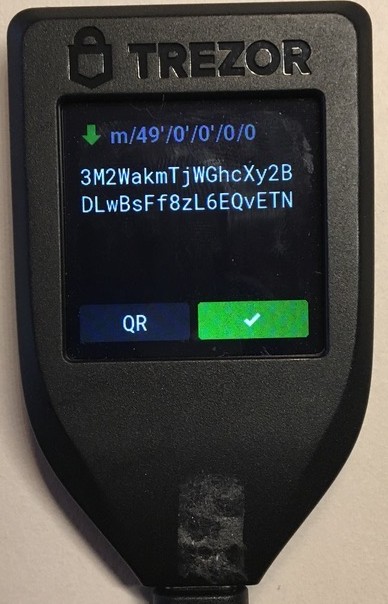
- Click on “Show full address” and then verify this address on the Trezor Model T’s touchscreen.
- Copy and paste this address into the wallet or exchange that you are sending cryptoassets from. For example, if you want to send cryptoassets from Binance to your Trezor Model T, then copy the address that is displayed in the Trezor web wallet, paste the Trezor address in the Binance withdrawal section and click send. We recommend that you first send a small amount to make sure you’re comfortable with the process.
- The Trezor web wallet allows you to click “Show new address” to display more public addresses. For many cryptocurrencies such as Bitcoin and coins similar to it, you can use one public address for all of your transactions. Using only one public address for receiving transactions with a hardware is completely safe. However some users prefer to use multiple addresses because it gives their transactions greater anonymity (In the case that one of their public addresses was associated with their personal information).
- Once the transaction is complete, your new balance will show under the “Account #.”
Sending cryptoassets from the Trezor Model T
- Select the specific cryptocurrency you want from the drop down menu at the top left.
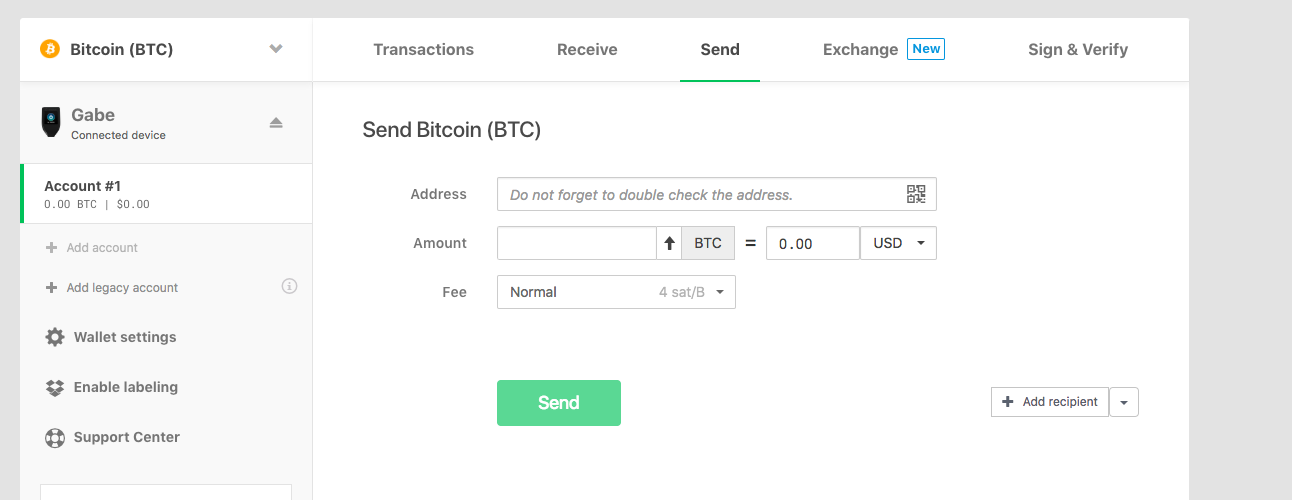
- Click on “Send.”
- You can then paste in the address you are sending to, select the amount you want to send and choose the transaction fee. Selecting a higher transaction fee will make the transaction complete faster.
- If you want to send Bitcoin to Binance, you would login to Binance and copy the receive address for Bitcoin. You would then go back to the Trezor web interface and paste this address in and click send.
- The Trezor web interface allows you to send funds to multiple addresses at the same time. To do this, click on “Add recipient.” This can be convenient and lower transaction fees.
- After you click “Send,” you will be asked to confirm the transaction on the Trezor Model T’s touchscreen. Verify that the address is correct by looking at a few of the characters and then press the checkmark.
Congratulations! You now know how to setup your Trezor Model T with the Trezor web interface and send and receive transactions.
Now you can explore the most popular and trusted global online exchanges, like Abra, Binance, Coinbase, Coinmama, and LocalBitcoins. Coinbase is the largest, in terms of trading volume, and the exchange–established in 2012, in the early crypto days–offers The Crypto Merchant blog readers 10$ worth of free bitcoin when they sign up with this exclusive link. Abra is a mobile-based exchange that supports a wide-range of cryptocurrencies, and is especially good for crypto traders who are on the go. Abra offers The Crypto Merchant blog readers $25 in free Bitcoin after your first deposit with a bank transfer or AmEx, or 1.5% cash back when you exchange in cryptos, when you download the Abra app.
Just remember to protect your word seed and your Trezor Model T physical device. You can now rest easily knowing your cryptoassets are being stored by the most secure method.
JOIN NOW AND GET 10% OFF YOUR FIRST ORDER
Join the 10,000+ crypto investors & enthusiasts who receive exclusive discounts, crypto investing and security guides, digital privacy protection tips and more every week.


